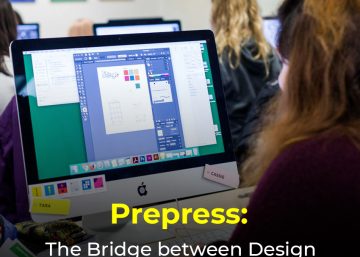
You often hear the term “dieline” when creating or shopping for custom boxes. People who aren’t familiar with packaging might think that only an expert would understand. The word is straightforward to making your packaging. Let’s dive deep into the topic of Packaging Prepress 101- What are Dielines and Proofs?
In this blog, we dive deep into the understanding of dielines. We also show you how to use them in your own custom packaging projects in the best way possible.
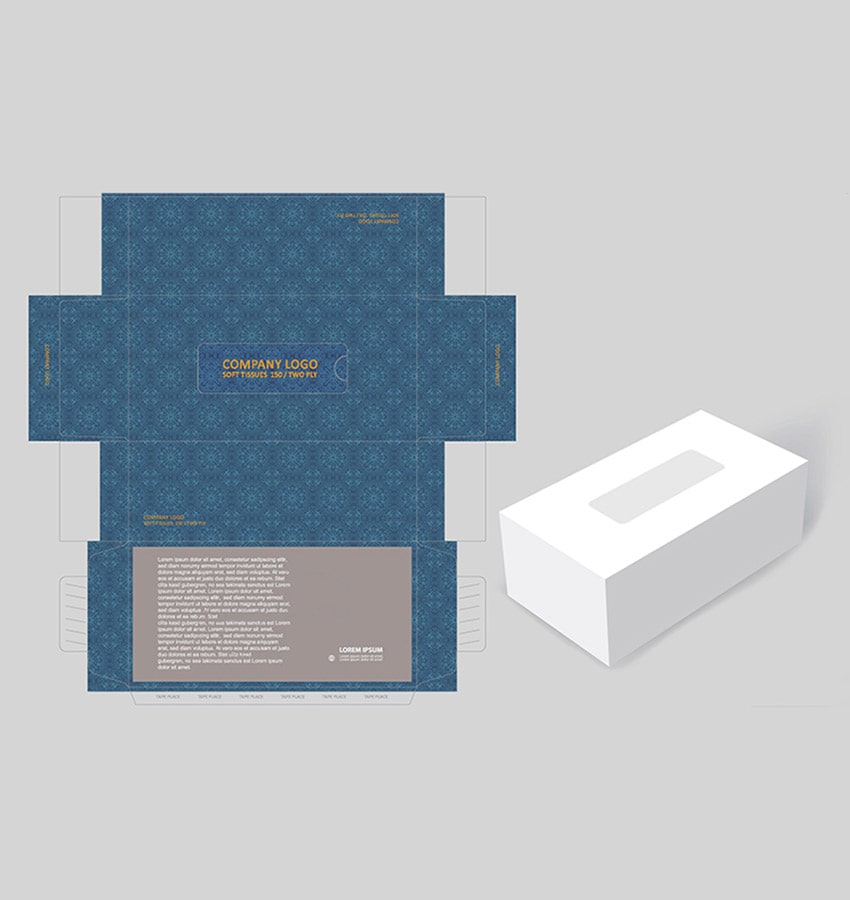
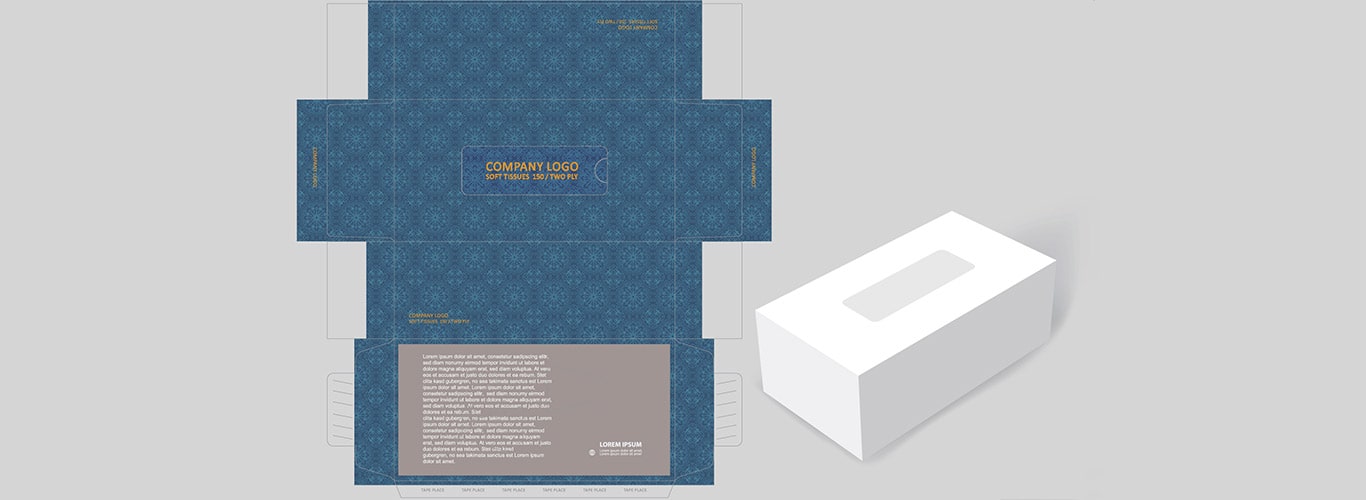
The term “dieline” refers to a template used in the packaging and printing industries to assure the right arrangement of a finished physical product. This template acts as a schematic, indicating all the folds and cut lines on a flattened box.
Dielines are developed by graphic designers, die cutters, or printers and are used to manufacture a variety of different forms of packaging, including pocket folders, envelopes, and boxes.
When your design is eventually sent to the printer, the dielines show the locations of the cut and perforation that the machine will do to prepare the package for folding. Generally, because these are two distinct bits of information, the perforation and cutting or trim lines should be situated on separate levels and represented by coloured dots. Finally, the printer executes two distinct steps of cutting and perforation.
In general, there are four distinct types of dielines, which are listed below:
1. The Trim Line
Trim lines are dielines that define the path that must be cut along the corrugated or paperboard. These lines function as a sort of road map for the die cutting machines.
2. The Bleed Line
Two lines are used for printing.
One line indicates the bleed (the region that is printed but is later clipped away), while the other indicates the print’s safe zone. Outside the trim line and the secure zone lines are the bleed lines. This also serves as the margin and is centred on the page.
The bleed lines extend beyond the trim lines. Additionally, they do not mark any of the holes. The bleed lines outline the graphics created for printing on the box. The print is extended beyond the trim lines to ensure no board area is left unprinted,even if the board moves slightly in the printing machine.
3. The Safe Zone Line
The safe zone lines are denoted by dotted lines offset inward from the trim lines. They indicate the locations of critical written text, such as branding, product names, and any other legible information.
4. The Fold Line
Finally, the fold lines indicate how the board will fold to form the box.
The arrangement of text and visuals within the box can be somewhat perplexing. Due to the box’s numerous flaps and folds, you do not want the text to be inverted, mirrored, or obscured by a flap. The simplest way to solve the problem is to construct a prototype box from simple card stock or board, label the surfaces and orientation of the surfaces, and then unfold the box.
After you’ve finalised the dielines and designs, you may place your order with your manufacturing partner.
Why Dielines Matter
Dielines are critical in the die-cutting process because they serve as the primary pattern for the artwork. Consider it a plan that maintains the physical integrity of the final printed product, including the following:
- Package sizing, scale, and dimensions.
- The location of all the visual elements, like logos, text, and images.
- Placement of creases, cutlines, glue tabs, eye marks, folds, and other connection points.
- Unique manufacturing notes and bleed requirements.
Once these elements are sketched, designers have a complete picture of how the finished product will look. Simply go to your kitchen and grab a box of cereal or crackers as an easy workout. All tabs should unfold and the box should be flat. You’ll be able to quickly see where all the creases, folds, and other visual components on the box’s sides, front, and back coincide. These are dielines on which a pencil might run.
Dielines, on the other hand, are not limited to boxes or square packaging. Additionally, they construct a diverse range of items, including beverage packaging, brochures, food packaging, and virtually any other product that requires custom packaging.
Proof
Proofing is the next step in the prepress process. The Proof is sent to you once the prepress team has reviewed your design. It is similar to sketching the dielines, but it includes comments and recommendations on how to optimise the design for manufacture. The prepress team may also make minor changes to the dielines in order to polish them for manufacturing.
Once the proof is authorised, you and your manufacturing partner agree. As a result, you must carefully examine the proof to ensure that it entirely fits your expectations. It is also critical that you make judgments fast because a day wasted in approving the proof means a day’s delay before manufacturing begins.
So, when designing your boxes, bear in mind the practical obstacles encountered during manufacturing and be cautious when examining the proof